
Your Custom Text Here
How to Assemble a Pittsburgh Seam for Sheet Metal Plenums
Have you gone to your local HVAC supply house to buy a plenum with a Pittsburgh seam that was not assembled? If you are an HVAC professional or do-it-yourselfer, more than likely you have. The purpose of this short tutorial is to show how to assemble a Pittsburgh seam in a few simple steps, with a couple simple tools.
Have you gone to your local HVAC supply house to buy a plenum with a Pittsburgh seam that was not assembled? If you are an HVAC professional or do-it-yourselfer, more than likely you have. The purpose of this short tutorial is to show how to assemble a Pittsburgh seam in a few simple steps, with a couple simple tools.
The Tools of the Trade
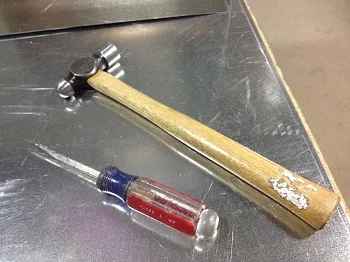
There are two hand tools you will need to get the job done and there's a pretty good chance you have them both in your tool bag, basement or kitchen junk drawer, a hammer and a screwdriver. The picture shows an 8oz. ball pein hammer, which is a good size and weight for getting a nice, flat seam. However, any normal hammer will work just fine as long as it's not heavy duty, like a sledge hammer. The screwdriver is a standard flat head which will be used to spread the seam of the Pittsburgh joint, making it easier to assemble the plenum.
The Look of a Pittsburgh Seam
So what is a Pittsburgh seam anyway? Basically, the seam shown below on the left is a Pittsburgh seam and gets it's name from the machine that forms it. A Pittsburgh machine is very common in the sheet metal fabrication trade and something we use on a daily basis. The seam is created by feeding flat stock through a set of rollers forming the seam as the sheet metal rolls through.
All this talk about Pittsburgh seams and I'm forgetting the other player in this assembly scenario. A sheet metal plenum with a Pittsburgh joint needs a quarter inch bend on the opposite side that will sit inside the Pittsburgh joint. The photo on the right shows the quarter inch bend that will be inserted into the Pittsburgh joint on the left.


The Steps
Step 1
The first thing you want to do, like mentioned above, is spread the Pittsburgh joint so the 1/4" bend will fit easily. Next, place the 1/4" seam inside the Pittsburgh seam, starting at one corner or joint of the plenum, shown in the photo below on the left.
Below, on the right, you can see what the joint should look like after placing the 1/4” seam inside the Pittsburgh seam.


Step 2
Next you want to pein or hammer over the 1/4” that is extending up above the flat plane of the plenum side. The first thing I do is pein over the top, middle and bottom (shown in the photo underneath on the right) corner to pin the side in place, helping to keep the side from sliding.


One trick to help the process:
After you have one side to this stage, take the other Pittsburgh side and start the opposite corner. This will help to prop up the first side you started, making the hammering process much easier to finish.
Step 3
Now you want to hammer down the entire side flat to finish the joint.
When these two joints are complete, flip the piece over and repeat the same steps to finish the un-capped portion of the plenum.

Do you need a custom supply air or return air plenum? Or do you have any questions? Let us help. Click here to contact our fabrication shop!
Related Blog Posts
Old School Custom Trunk Duct Fabrication
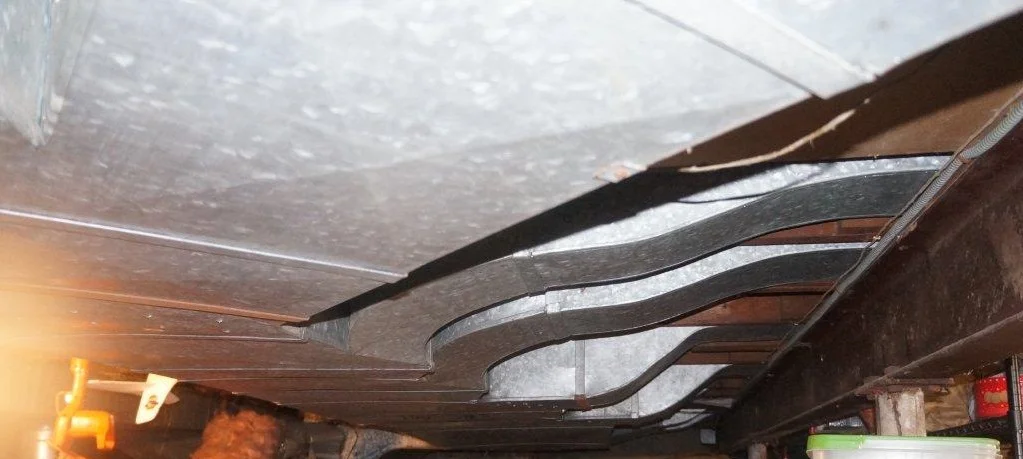
Currently I am fabricating some custom transitions to marry a new heat pump system to this existing trunk duct. The customer emailed these this morning to give me an overview of what I would be hooking the new duct transitions up to. Always helpful when a customer is willing to take the time and snap a few shots of what the job looks like.

The ductwork in this house is absolutely fantastic! Yes, it's old and may be sagging in some area's after hanging for years and years. All of this is normal. Should it be changed? Maybe, but all in all it looks ok.
I have only come across a few jobs with duct where this much time and effort was placed into the fabrication and installation. The time needed is easily double, maybe even triple of what lead times would be today. Plus, the man hours into laying out the duct needed to complete the job.
The cool part is the way the duct line is laid out and how each heat run is a rectangular or square branch with multiple rounded offsets and risers. Today, all of these heat runs would be round and branching off the top of the main trunk line. And the fabrication time would be minimal because much of what you see would be standard, stock sizes that can be purchased at your local Home Depot.
However, the time and effort in the fabrication, with rounded inner throats is completely custom and just fabulous. My father and I completely appreciate the craftsmanship that went into this amount of bespoke trunk duct and fittings. Very cool.

Custom Galvanized Sheet Metal Ash Box
The benefit of our fabrication shop is the ability to fabricate small numbers of custom projects for a range of products. Our main focus being HVAC custom ductwork and fittings, but we fabricate a lot of specialty items for many of our customers.
Last week I received a request through our website for a custom 15" x 15" x 15" ash box with a sliding top cover.
The benefit of our fabrication shop is the ability to fabricate small numbers of custom projects for a range of products. Our main focus being HVAC custom ductwork and fittings, but we fabricate a lot of specialty items for many of our customers.
Last week I received a request through our website for a custom 15" x 15" x 15" ash box with a sliding top cover. For some reason my immediate thought was urn or something like it. However, I was completely wrong, the customer was only looking for a box to rake old ash and embers from an outdoor grilling station.
I had a tiny idea of what he might be talking about, growing up in a house with a wood stove and many family members with the same. Nevertheless, asking for any documentation or drawings is always worth asking. I emailed a request for a picture or something he could draw to give me a starting point. Surprising to me, he had a picture of exactly what he needed.
Receiving a quality photo of what the customer needs is rare, with me usually coming up with something on the fly or deciphering a crude drawing on a scrap sheet of paper. This is a rare and extremely beneficial occasion.

The customer requested I do my best to keep it as waterproof as possible because the box would reside outside most of the time. My goal was to keep the simplicity of the box he had sent me thereby keeping the cost down. Needless to say this was not the most difficult of fabrications, but that doesn't mean I don't keep all customer requests in mind and do my best with each order.
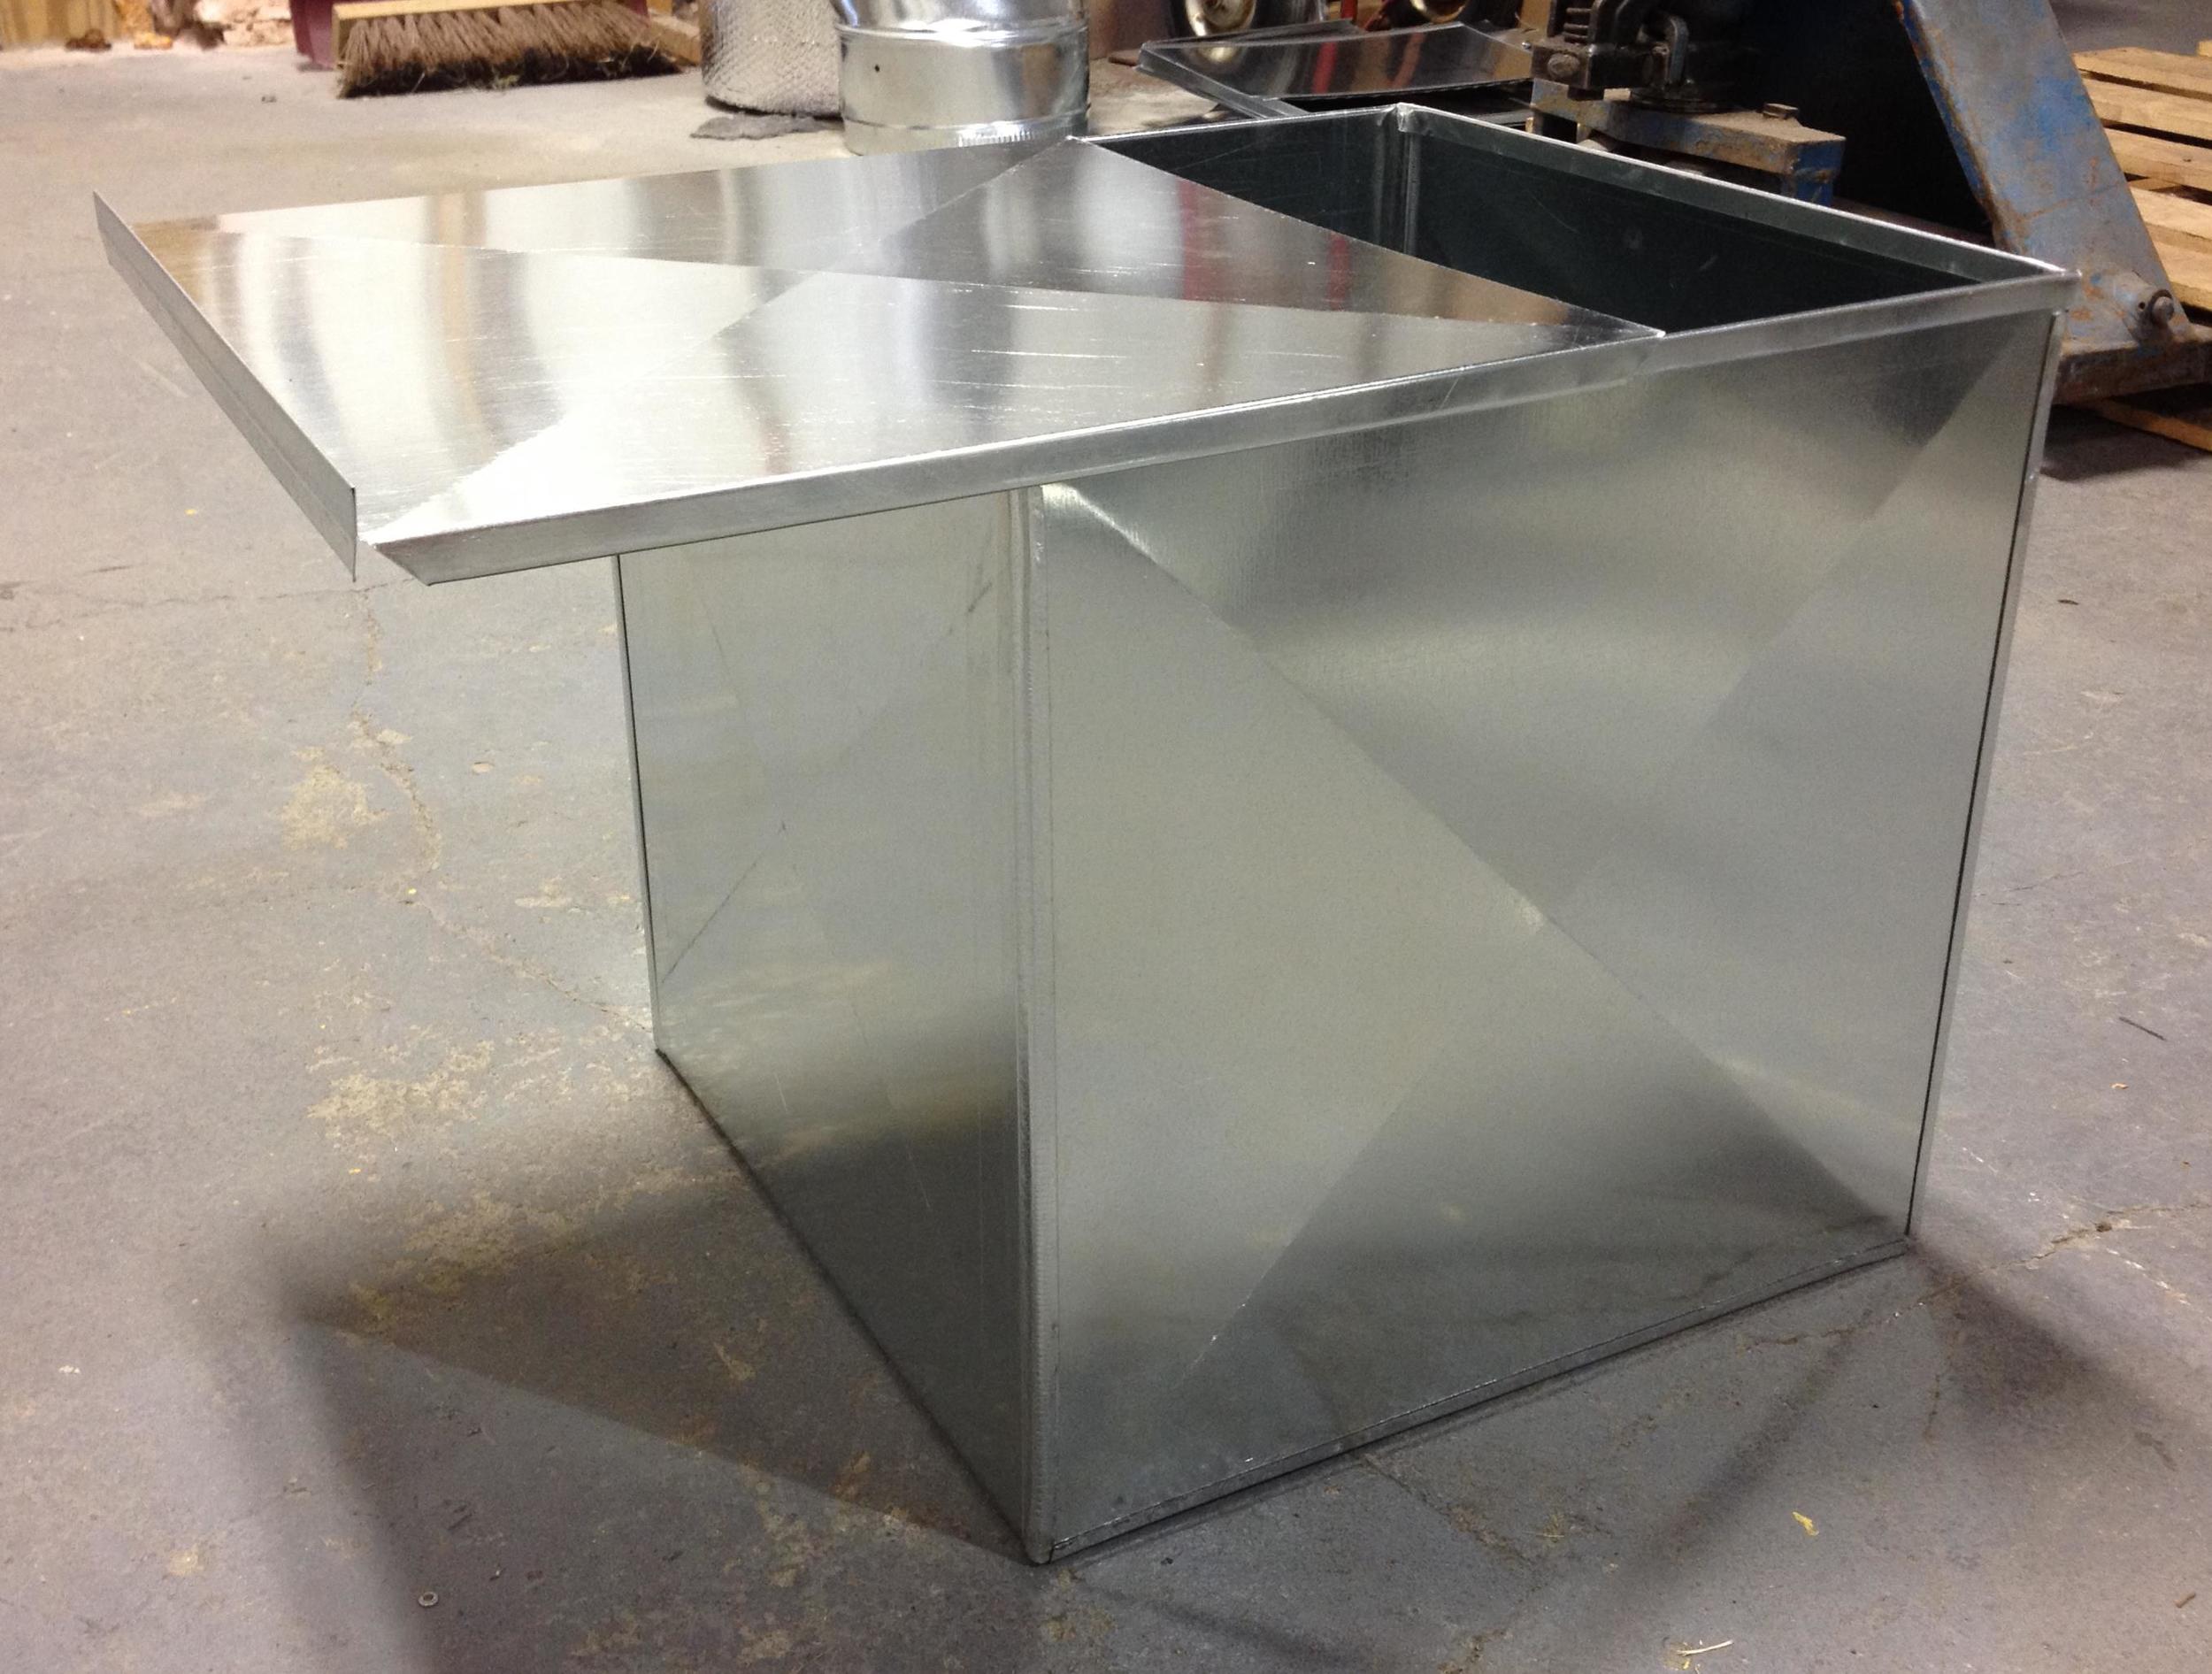
I got to work and basically made the same box with a few minor adjustments to the original design with the biggest one being to the sliding cover. The extended handle was unnecessary, so I simply rolled a hem flange up with a 1/2" extension down to help keep any water from running down inside the box. You can see this depicted in one of the photos below.
The finished box is not completely waterproof mind you, but any chance to keep water out is a good thing and something I kept in mind. Hence the cross break on the cover, helping runoff of any water, keeping it from pooling on the top. There is also a 1/4" extension at the opposite end of the cover to help with water drainage.


My goal with any customer is to make sure they get what they're paying for no matter how simple the request may be. It's always fun to fabricate the more intricate items, but the simple pieces are the ones people remember because they usually solve a simple problem. Every customer is important.
Plus, they're the first ones to promote you when things come up in conversation.
Great Video Showing Fabrication of The Tesla Model S
A fantastic video showing behind the scenes fabrication and assembly of a Tesla Model S. This makes our new CNC plasma machine look like something out of the Flintstones. The factory and the innovative methods are really cool, leaving me wanting to take a tour of the factory someday.
BTW, I love our new CNC plasma machine!
Custom Duct Transitions For AC Coil
Installing a new AC coil
There are times when installing a new AC coil to existing duct work can be simple and times when the task can be difficult. Usually you can get the proper cased AC coil for the furnace you are installing and either easily transition the duct to the existing duct line or you can have a custom plenum made fitting the coil to the furnace.
Then there are times when you need to transition from your furnace to the size of the uncased AC coil and then back again to the custom size of your existing duct work. When this happens your first call should be to us, K & E Sheet Metal, because this is exactly why we exist. Custom plenums and transitions are our specialty :)
Installing a new AC coil
There are times when installing a new AC coil to existing duct work can be simple and times when the task can be difficult. Usually you can get the proper cased AC coil for the furnace you are installing and either easily transition the duct to the existing duct line or you can have a custom plenum made fitting the coil to the furnace.
Then there are times when you need to transition from your furnace to the size of the uncased AC coil and then back again to the custom size of your existing duct work. When this happens your first call should be to us, K & E Sheet Metal, because this is exactly why we exist. Custom plenums and transitions are our specialty :)
Taking measurements
Today we received an order for a plenum with transitions needing to get from one measurement, to another and then back to yet another. Below is a crude drawing of the sizes needing to be transitioned.

In order to make the transitions and fit the AC coil, I will need to fabricate two transitions and a straight plenum, placed in the center, that will house the coil and have a door for servicing. The transitions can be entered into the computer system and cut with our new CNC plasma machine, while the straight box I will cut with tin snips.

Looking down inside the AC coil plenum at the shelf that will hold the coil
The fabrication
The bottom transition, 13 1/4 x 18 up to 17 1/4 x 19 3/4 will have a 1/2" flange on the new furnace side and S-lock on the top side that will accept the straight plenum box. Inside the plenum box will be a 24 gauge metal shelf (Picture to the right) to hold the AC coil inside the 17 1/4 x 19 3/4 box.
From the top of the AC coil box I will transition to the existing duct inside the customer's home. Basically, the old duct work leftover after tearing out the old furnace.
All being said the fabrication for this order sounds much harder than it actually is. Many times the hardest thing is translating what the customer is thinking into how my brain processes things. Once this hurdle is completed the process goes rather quick and easy. This particular order foe example ended up being two simple custom transitions with a straight AC coil box sandwiched in between.
Below is a photo of the finished plenum ready to be picked up and installed

Related Blog Posts
Air Conditioning and AC Coil Books
New YouTube Video: Cold Air Boot Cutting Process
Our newest YouTube video showing the cutting process of our custom cold air boots. Our new CNC plasma machine has sliced our cut times in half helping to quicken the assembly process here in the fabrication shop.
Bending Custom Trunk Duct With 8' Sheet Metal Break
Even though we have stepped up our game in regards to cutting sheet metal, we still kick it old school when it comes to bending all of our custom trunk duct and fittings.